6.2 Approving, rejecting, and canceling requests
You can approve, reject, or cancel an outstanding request for a person; for example a request to issue a device.
Whether or not a request requires approval depends on the Validate Issuance setting in the credential profile; see the Working with credential profiles section in the Administration Guide for details.
To approve or reject a request, you must have permission to validate the credential profile; see the Constrain credential profile validator section in the Administration Guide for details. You also cannot be the operator who made the request, or the person who will receive the requested device.
6.2.1 Approving requests
-
Search for a request, and view its details.
See section 6.1, Searching for a request.
You can use the alternative Requests for review report to display all requests that are awaiting validation.
You can also view a request from any form that displays a link to the request.
For example:
- Click the entry in the list of requests in the REQUESTS tab of the View Person form.
- Click the entry in the list of requests in the DEVICE REQUESTS tab of the View Device form.
- View the screen that appears automatically after you have requested a device.
-
Click the Approve Request option in the button bar at the bottom of the screen.
You may have to click the ... option to see any additional available actions.
If this option is not available, the request does not require validation.
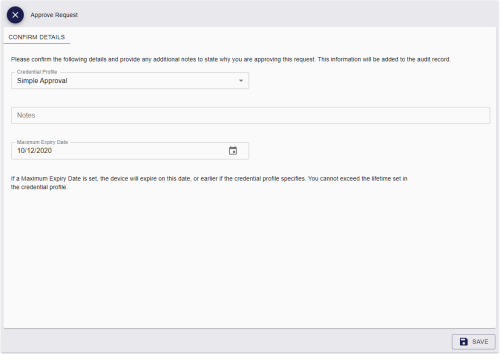
The Approve Request screen appears.
-
Review the details of the request.
If the Change Credential Profile At Approval configuration option (on the Issuance Processes page of the Operation Settings workflow) is set, you can select a different credential profile from the drop-down list. You must have the appropriate permission to request the credential profile, and the target must have the appropriate permission to receive it.
You can provide any additional Notes to state why you are approving the request.
If the Set expiry date at request option (on the Issuance Processes page of the Operation Settings workflow) is set, you can set or amend the Maximum Expiry Date for the request. You can select any date up to the Maximum credential expiry date specified for the person
The credential profile can override the Maximum credential expiry date set for the person if the Ignore User Expiry Date option on the credential profile is set.
If maximum expiry date set in the request exceeds the Maximum credential expiry date set for the person, at approval, if the operator does not have permission to modify they date (that is, it is not shown on screen) the maximum expiry date for the request is reset to be the same as the date set for the person. This happens automatically; the updated date is also recorded in the audit, and the correct date is shown when subsequently viewing the request. In this scenario, if the operator does have permission to change the date in the request, the date validation highlights that it needs to be changed, and the operator cannot proceed until they have amended the date. The calendar control is constrained to the date set for the person.
If you do not want to approve the request, click the Close button:

- To approve the request, click SAVE.

6.2.2 Rejecting requests
-
Search for a request, and view its details.
See section 6.1, Searching for a request.
You can use the alternative Requests for review report to display all requests that are awaiting validation.
You can also view a request from any form that displays a link to the request.
For example:
- Click the entry in the list of requests in the REQUESTS tab of the View Person form.
- Click the entry in the list of requests in the DEVICE REQUESTS tab of the View Device form.
- View the screen that appears automatically after you have requested a device.
-
Click the Reject Request option in the button bar at the bottom of the screen.
You may have to click the ... option to see any additional available actions.
If this option is not available, the request does not require validation. You can still cancel the request; see section 6.2.3, Canceling requests.
The Reject Request screen appears.

-
Review the details of the request, and provide any additional Notes to state why you are rejecting the request.
The Notes are mandatory.
If you do not want to reject the request, click the Close button:
- To reject the request, click SAVE.

6.2.3 Canceling requests
-
Search for a request, and view its details.
See section 6.1, Searching for a request.
You can use the alternative Requests for review report to display all requests that are awaiting validation.
You can also view a request from any form that displays a link to the request.
For example:
- Click the entry in the list of requests in the REQUESTS tab of the View Person form.
- Click the entry in the list of requests in the DEVICE REQUESTS tab of the View Device form.
- View the screen that appears automatically after you have requested a device.
-
Click the Cancel Request option in the button bar at the bottom of the screen.
You may have to click the ... option to see any additional available actions.
The Cancel Request screen appears.

-
Review the details of the request, and provide any additional Notes to state why you are canceling the request.
The Notes are mandatory.
If you do not want to cancel the request, click the Close button:
- To cancel the request, click SAVE.

6.2.4 Approving multiple requests
If you have several requests to approve at the same time, you can approve them in a batch instead of approving them one by one.
To approve multiple requests:
-
Search for the requests you want to approve.
See section 6.1, Searching for a request.
You can use the alternative Requests for review report to display all requests that are awaiting validation.
-
Use the checkboxes to the left of the requests to select one or more requests.
Note: If you select one request, the process is the same as clicking the Approve Request option in the button bar at the bottom of the View Request screen; MyID uses the batch process only if you select more than one request. See section 6.2.1, Approving requests for details of approving a single request.
-
From the Tools menu, select Approve Request.

The Approve Request screen appears.

If the Change Credential Profile At Approval configuration option (on the Issuance Processes page of the Operation Settings workflow) is set, you can select a different credential profile from the drop-down list.
Note: The list of credential profiles is constrained by the roles of the operator, not the potential recipients; this means that you can attempt to approve requests for devices using credential profiles that are not available to an individual recipient. If a credential profile is not available for a recipient, the request approval fails at the batch processing stage; however, the requests for other recipients who do have permission to receive the credential profile succeed.
If the Set expiry date at request option (on the Issuance Processes page of the Operation Settings workflow) is set, you can set or amend the Maximum Expiry Date for the request; see section 6.2.1, Approving requests.
-
Provide any additional Notes to state why you are approving the requests.
The Notes are optional.
If you do not want to approve the requests, click the Close button:
-
Click Save.
The confirmation screen appears.
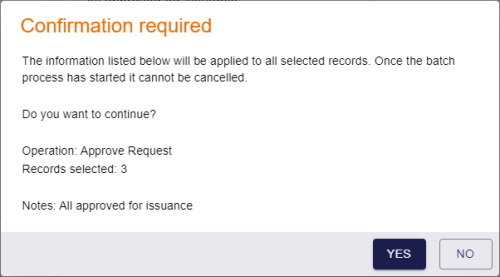
-
Click Yes to proceed with the batch approval, or No to go back to the Approve Request screen.
When you click Yes, the Batch Processing screen appears.
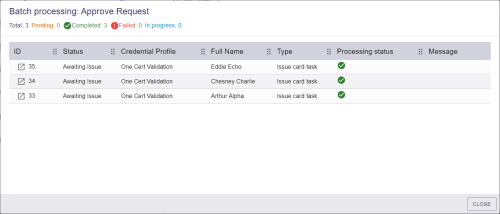
The request approvals are processed. The table shows the status of each request:

The approval succeeded. 
The approval failed. The Message column displays the reason for the failure; for example, you may have attempted to approve a request that was already in a Completed, Canceled, or Failed state. -
Click Close.


6.2.5 Rejecting multiple requests
If you have several requests to reject at the same time, you can reject them in a batch instead of rejecting them one by one.
To reject multiple requests:
-
Search for the requests you want to reject.
See section 6.1, Searching for a request.
You can use the alternative Requests for review report to display all requests that are awaiting validation.
-
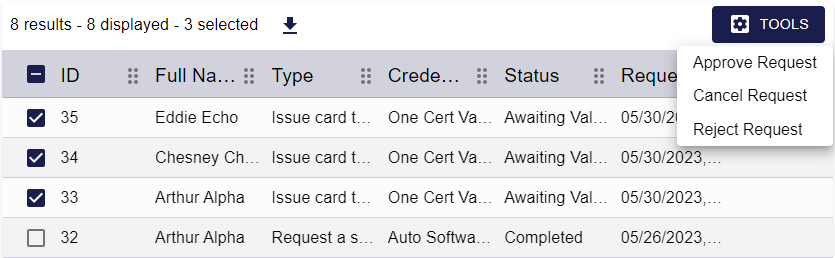
Use the checkboxes to the left of the requests to select one or more requests.
Note: If you select one request, the process is the same as clicking the Reject Request option in the button bar at the bottom of the View Request screen; MyID uses the batch process only if you select more than one request. See section 6.2.2, Rejecting requests for details of rejecting a single request.
-
From the Tools menu, select Reject Request.
The Reject Request screen appears.

-
Provide any additional Notes to state why you are rejecting the requests.
The Notes are mandatory.
If you do not want to reject the requests, click the Close button:
-
Click Save.
The confirmation screen appears.
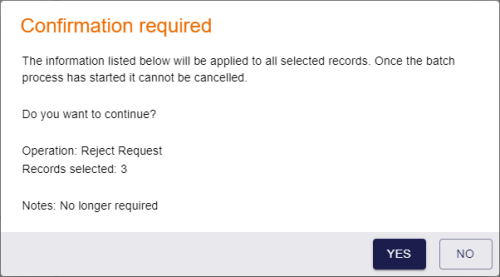
-
Click Yes to proceed with the batch rejection, or No to go back to the Reject Request screen.
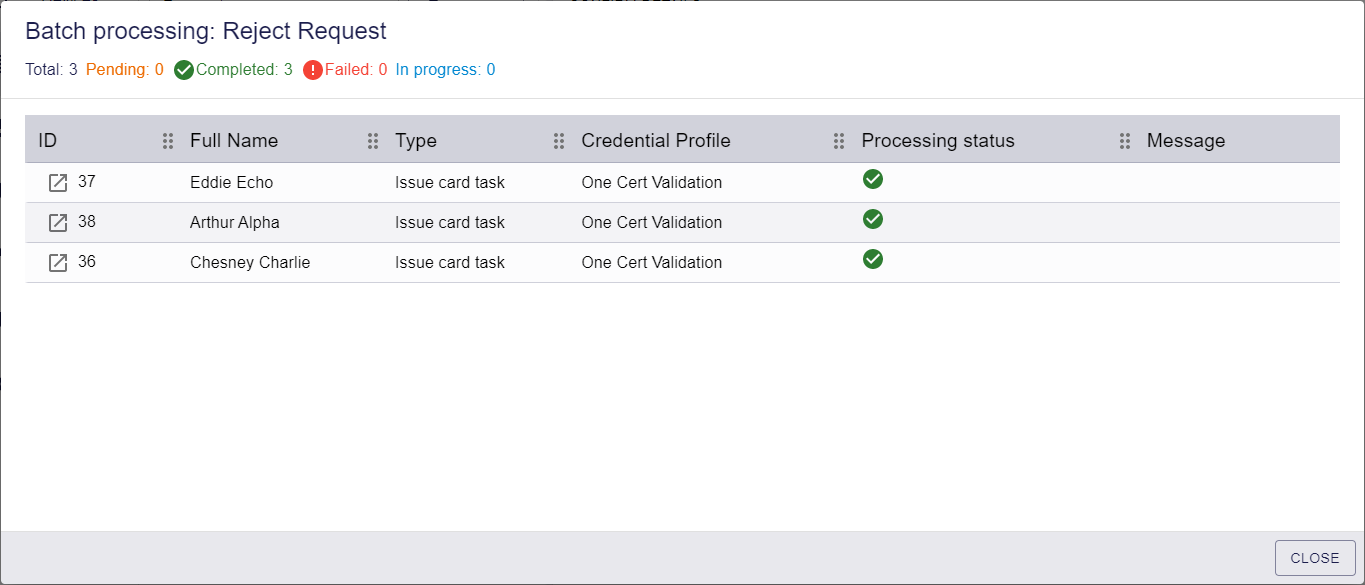
When you click Yes, the Batch Processing screen appears.
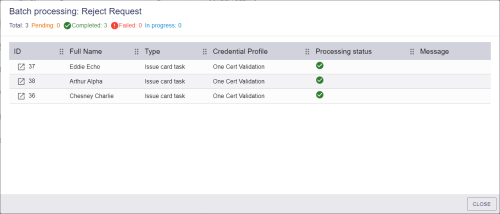
The request rejections are processed. The table shows the status of each request:
The rejection succeeded.
The rejection failed. The Message column displays the reason for the failure; for example, you may have attempted to reject a request that was already in a Completed, Canceled, or Failed state. -
Click Close.


6.2.6 Canceling multiple requests
If you have several requests to cancel at the same time, you can cancel them in a batch instead of canceling them one by one.
To cancel multiple requests:
-
Search for the requests you want to cancel.
See section 6.1, Searching for a request.
You can use the alternative Requests for review report to display all requests that are awaiting validation.
-
Use the checkboxes to the left of the requests to select one or more requests.
Note: If you select one request, the process is the same as clicking the Cancel Request option in the button bar at the bottom of the View Request screen; MyID uses the batch process only if you select more than one request. See section 6.2.3, Canceling requests for details of canceling a single request.
-
From the Tools menu, select Cancel Request.
The Cancel Request screen appears.
-
Provide any additional Notes to state why you are canceling the requests.
The Notes are mandatory.
If you do not want to cancel the requests, click the Close button:
-
Click Save.
The confirmation screen appears.

-
Click Yes to proceed with the batch cancellation, or No to go back to the Cancel Request screen.
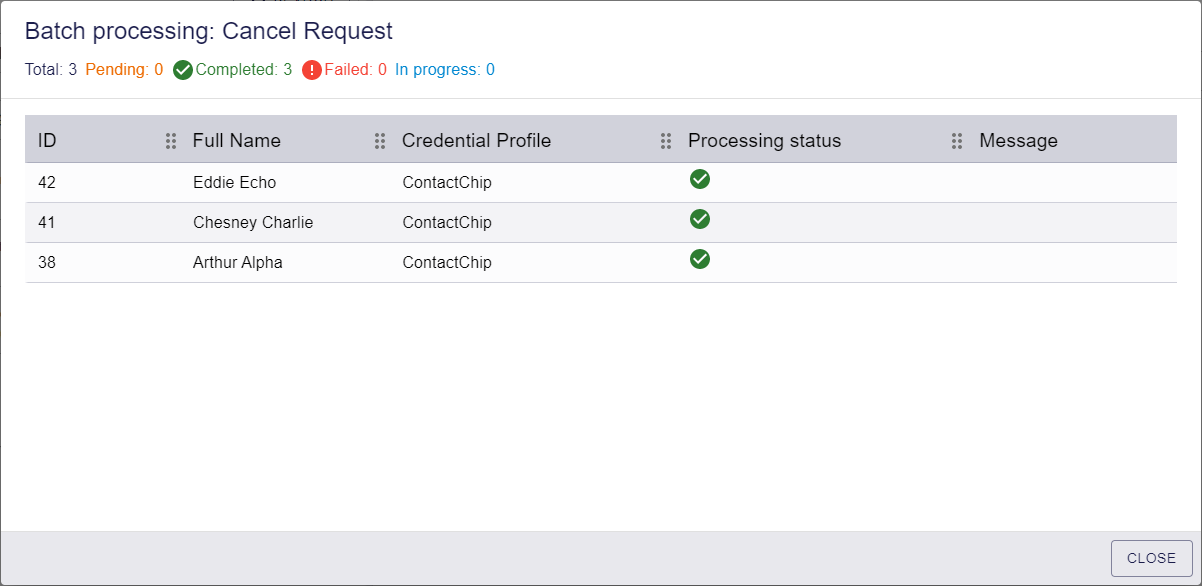
When you click Yes, the Batch Processing screen appears.

The request cancellations are processed. The table shows the status of each request:
The cancellation succeeded.
The cancellation failed. The Message column displays the reason for the failure; for example, you may have attempted to cancel a request that was already in a Completed, Canceled, or Failed state. -
Click Close.